Kubernetes networking · Beginner guide
Migrate ingress-nginx to Gateway API, Step by Step
Your cluster still sends web traffic through ingress-nginx. This guide walks you through moving a SeaGit cluster to Gateway API with Envoy, one button at a time. Each step has a screenshot, and you can go back until the last step.
By Muhammad Soliman, Founder at SeaGit
·
Key takeaways
- The migration is four buttons, in order: Prepare Envoy, Shift traffic (10%, 25%, 50%, 100%), Move DNS to Envoy, then Finish and remove NGINX.
- Until DNS moves, every step can be undone. During the soak period after DNS moves, you can move DNS back to NGINX. Finish cannot be undone from the panel.
- The soak period is your choice: 15 minutes, 1 hour, 6 hours or 24 hours.
- The Ingress tab is available only for SeaGit clusters on Amazon EKS in your own AWS account.
What is this about?
Think of your cluster as an office building. Every visitor walks through the front door first. The front door reads the address on the request, such as shop.example.com/cart, and sends the visitor to the right room, which is your app. In Kubernetes, that front door is called an Ingress controller.
For years, many clusters used a front door called ingress-nginx. Kubernetes retired it in March 2026. Existing clusters keep working, but nobody will fix the next security bug in it. If you want the reasons and a check for your own cluster, read Kubernetes Ingress NGINX End of Life: Now What?. This article covers only the how.
The new standard for the same job is Gateway API. It splits the front door into parts: a Gateway that the platform team owns, and routes (called HTTPRoutes) that each app team owns. Envoy is a proxy, the program that actually forwards each request to the right app. SeaGit runs Envoy through Envoy Gateway, which reads the Gateway API objects.
The migration moves the front door in small steps. Envoy starts next to NGINX. A share of traffic goes to Envoy first. Only then does the DNS for your hostnames move. NGINX is removed last.
Words you will see
- Ingress
- A Kubernetes object that says which hostnames and paths go to which app.
- Ingress controller
- The program that reads Ingress objects and does the routing. ingress-nginx is one.
- Gateway API
- The newer Kubernetes standard for routing, with Gateway and HTTPRoute objects.
- Envoy
- A proxy that forwards requests. Envoy Gateway runs it and reads Gateway API objects.
- Canary
- Sending a small share of real traffic to something new first, and raising the share only while it behaves.
- Load balancer
- A cloud service with a public address. Traffic from the internet enters through it.
- DNS
- The internet’s phone book. It turns a hostname such as app.example.com into an address.
- TTL
- How long other computers keep a DNS answer before they ask again.
- cert-manager
- A cluster add-on that gets and renews TLS certificates, here from Let’s Encrypt, a free certificate authority.
- kubectl
- The Kubernetes command-line tool. Optional here: every step in this guide is a click in the console.
- Soak period
- The wait after DNS moves, when NGINX stays up so clients with the old answer still work.
What you need before you start
- A SeaGit cluster on Amazon EKS in your own AWS account. The Ingress tab does not appear on other providers.
- The cluster started. The panel says “Start the cluster to run a migration step” when it is stopped.
- A supported Kubernetes version. The Envoy Gateway release SeaGit installs supports Kubernetes 1.33 to 1.36. The migration itself does not check the version, so confirm your cluster is in that range before you start.
- No blockers. If an Ingress uses a setting Envoy cannot serve, the panel lists it. DNS stays on NGINX until you change that Ingress.
- Time to watch your apps between steps. The soak period you choose is at least 15 minutes.
If you are new to Kubernetes, you do not need to write any YAML for this migration. Everything runs from the SeaGit panel.
The big picture
Figure 1 shows the five stages in the panel, and how a visitor’s request travels at each one. Read it once before you start. It tells you where you are when you look at the screenshots below.
Step-by-step walkthrough
Open your cluster in the SeaGit dashboard and go to the Ingress tab. The steps below use the buttons on that tab, in the order shown. Each step has the same parts: what to click, what you will see, what happens behind the scenes, and whether you can undo it.
Step 1: Prepare Envoy
What to click. Open the cluster page and go to the Ingress tab. Click Prepare Envoy.
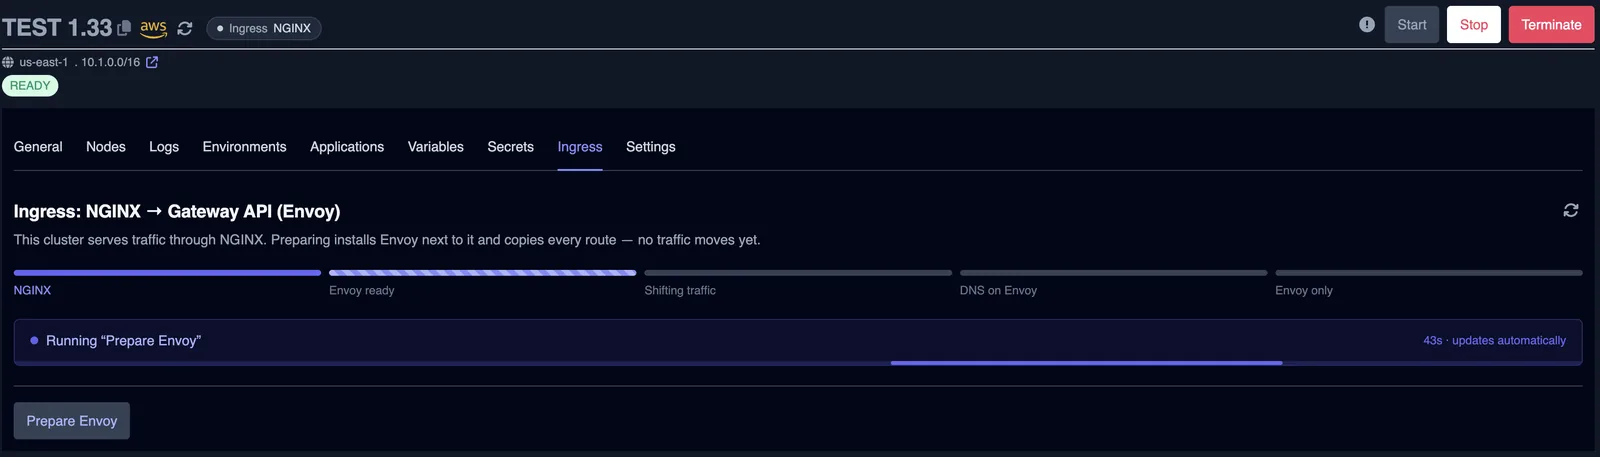
What you will see. A progress bar and the line Running “Prepare Envoy”. When the step finishes, the tracker moves to Envoy ready. No traffic has moved yet.
What is happening behind the scenes. SeaGit installs Envoy Gateway next to NGINX. It then copies each route it can serve into Gateway API objects, and sends a small test request through the new path before it reports success.
Can I undo this? Yes. Abort migration is offered at this stage. It removes Envoy and the copied routes, and NGINX keeps serving everything.
Step 2: Shift traffic to Envoy
What to click. Under Send to Envoy, click 10%. When that finishes, click 25%, then 50%, then 100%. Each click is one step. Wait for the running step to finish before you click the next share.
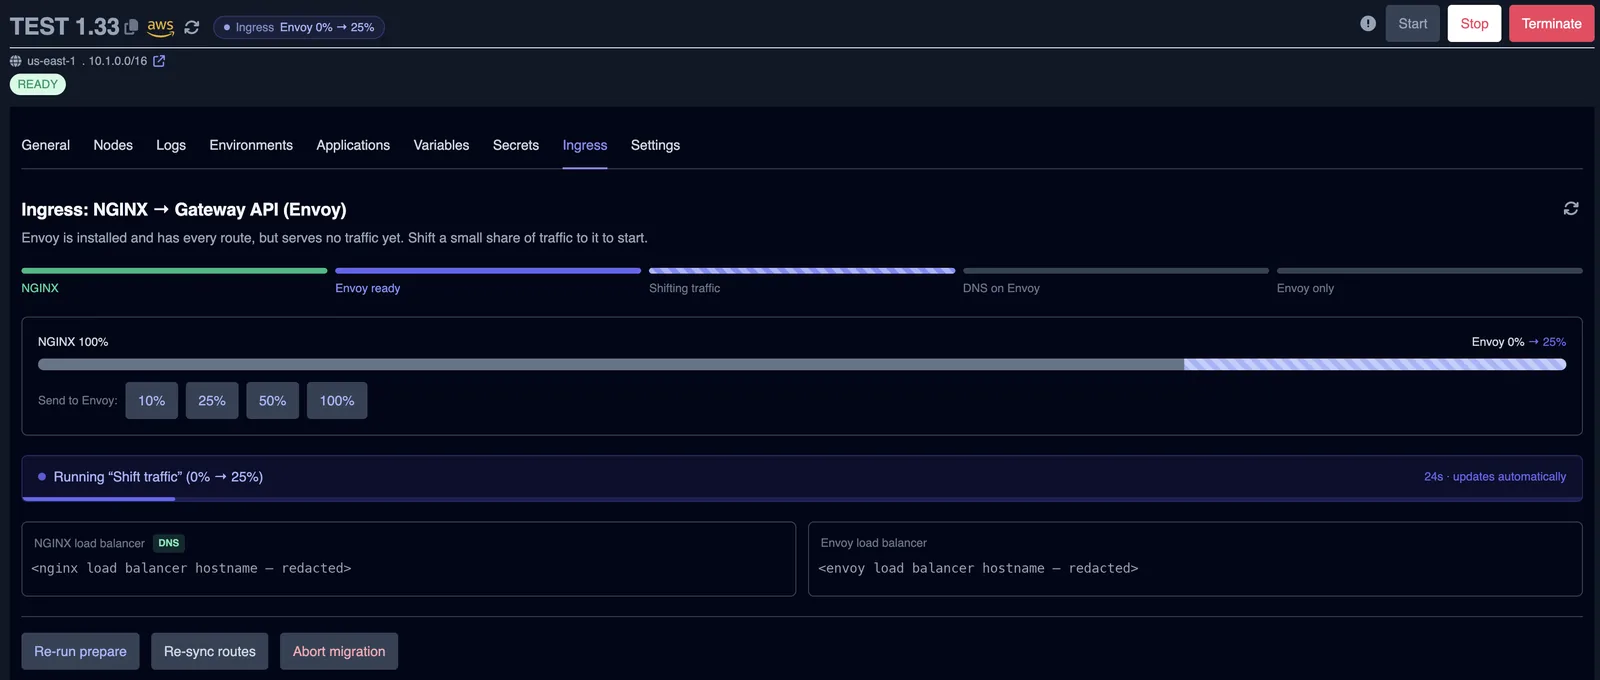
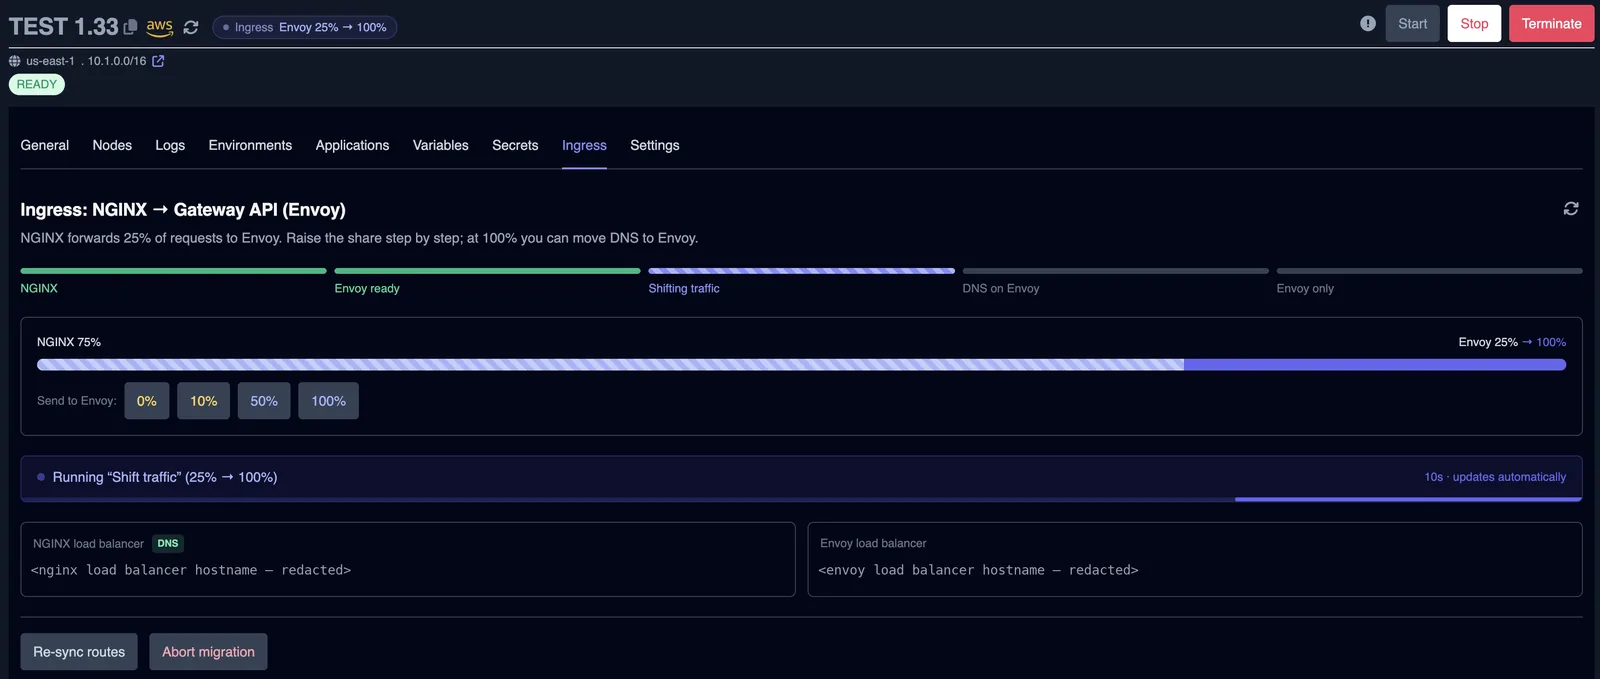
What you will see. A bar with two parts, NGINX on the left and Envoy on the right. The panel shows the running step as Running “Shift traffic” with the start and target share. Buttons for the other shares stay visible.
What is happening behind the scenes. This is a canary. NGINX forwards that share of each host’s requests to Envoy, using an NGINX canary Ingress, and serves the rest itself. Envoy is tested with real requests while NGINX stays in charge, and because your DNS records do not change in this stage, lowering the share takes effect without waiting on DNS caches.
Can I undo this? Yes. Click 0% to send all traffic back to NGINX. DNS never moved, so nothing else changes. Abort migration is also offered while the cluster is at this stage.
Step 3: Move DNS to Envoy
What to click. When Envoy serves 100%, open the Keep NGINX for dropdown and pick a soak period: 15 minutes, 1 hour (the default), 6 hours or 24 hours. Click Move DNS to Envoy, then confirm in the dialog.
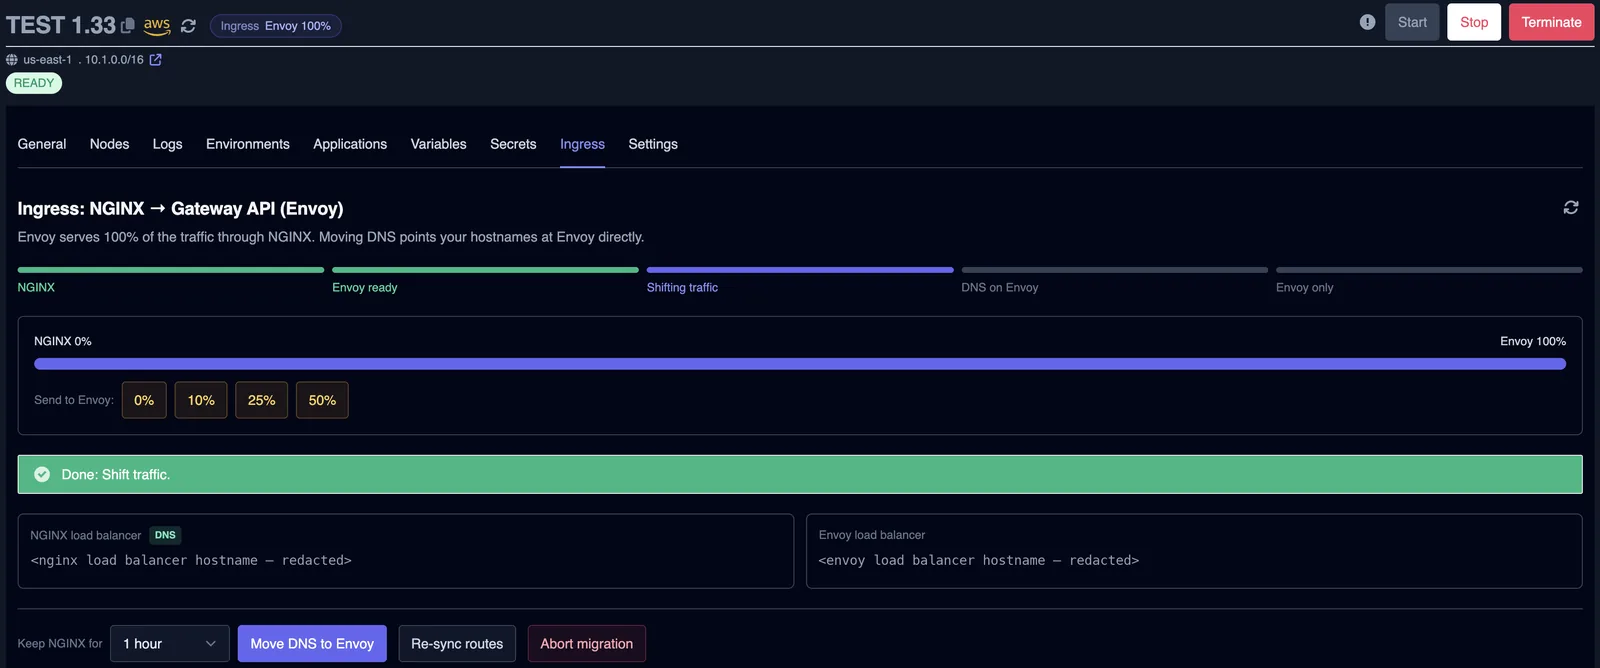
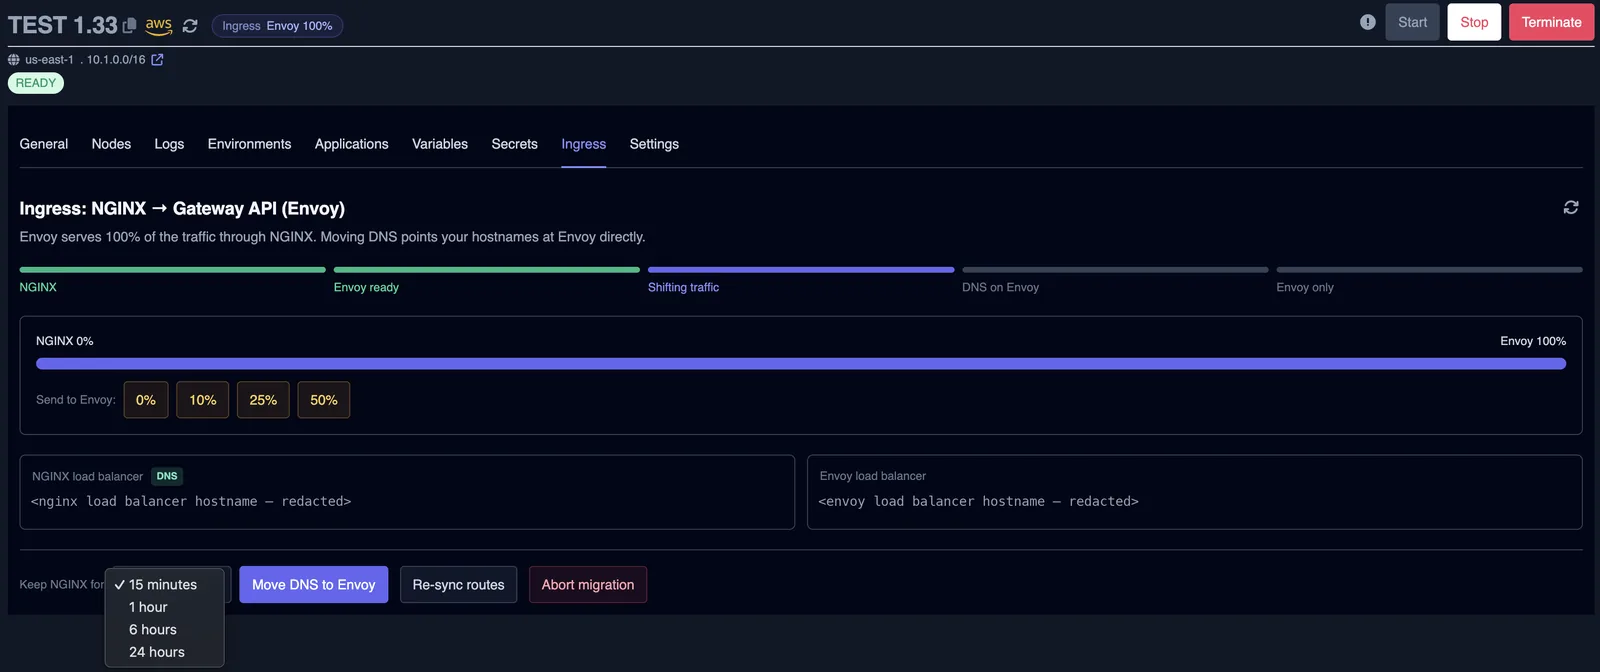
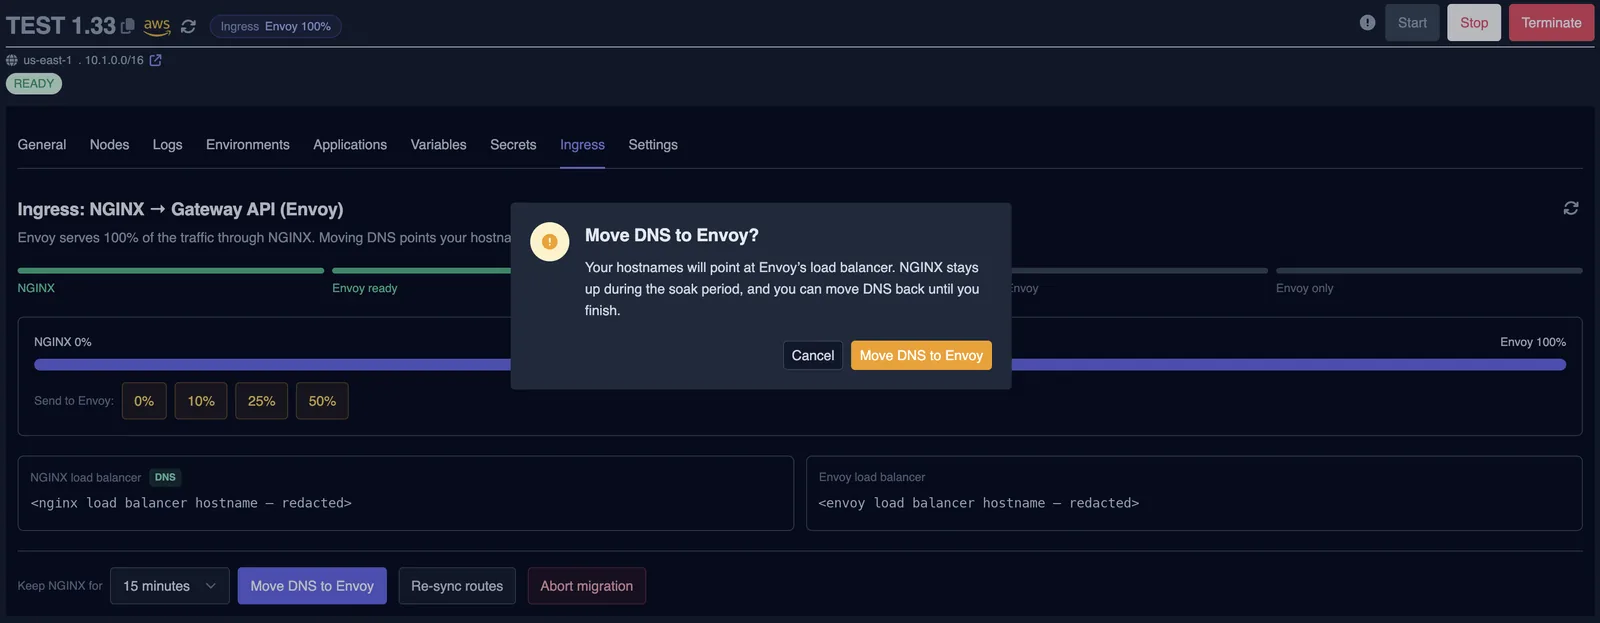
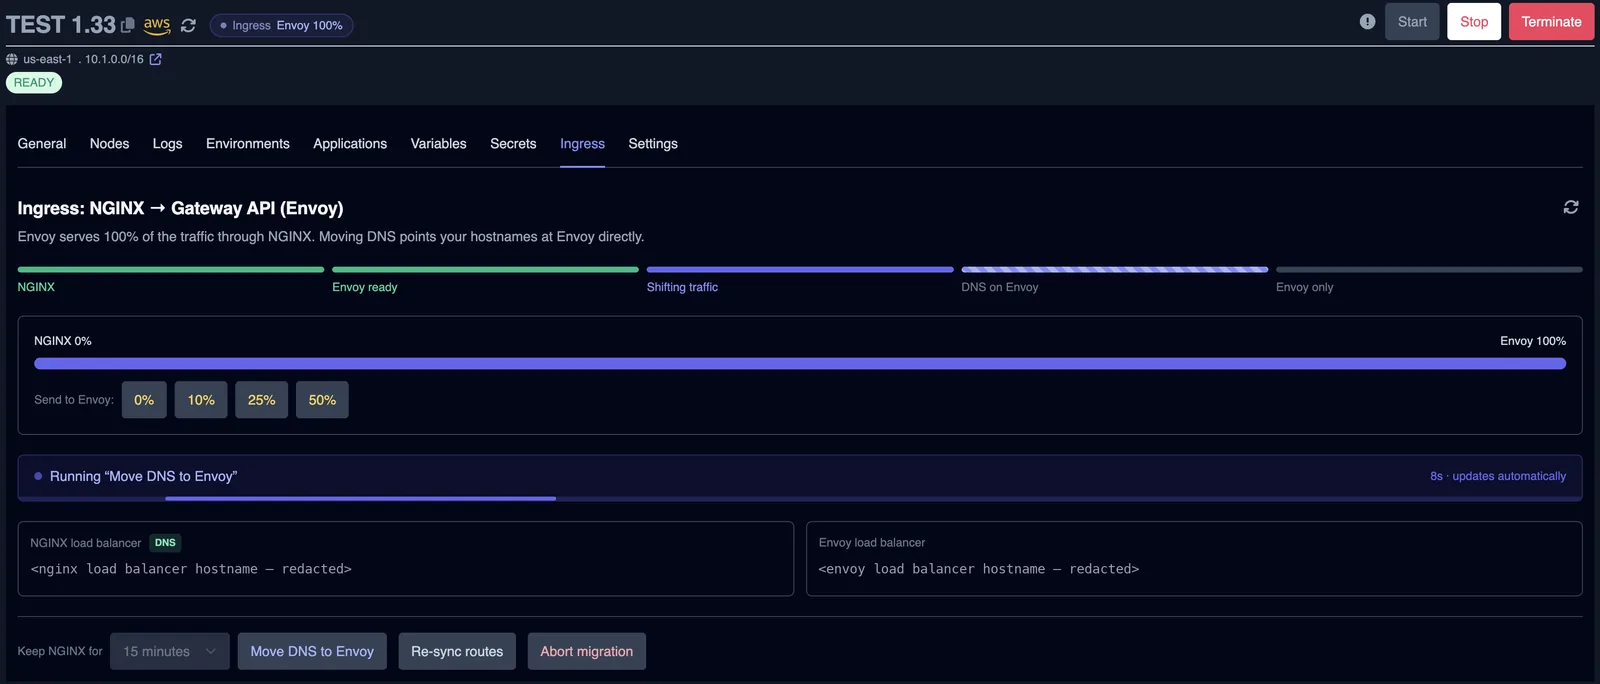
What you will see. The confirmation text: Your hostnames will point at Envoy’s load balancer. NGINX stays up during the soak period, and you can move DNS back until you finish. After the step, the tracker moves to DNS on Envoy.
What is happening behind the scenes. Before it changes DNS, SeaGit checks the path that real visitors will use: Envoy’s load balancer, then Envoy, then your app. Then it points your hostnames at Envoy’s load balancer. NGINX stays up for the soak period you picked.
Can I undo this? Yes, until you finish. During the soak period, click Move DNS back to NGINX. Your hostnames point at NGINX again, and Envoy keeps running.
Step 4: Wait out the soak period
What to click. Nothing to click. Use the time to check your app (see Check that it worked). The Finish and remove NGINX button does not appear until the soak period ends. Until then, the panel shows Finish available in with a countdown.
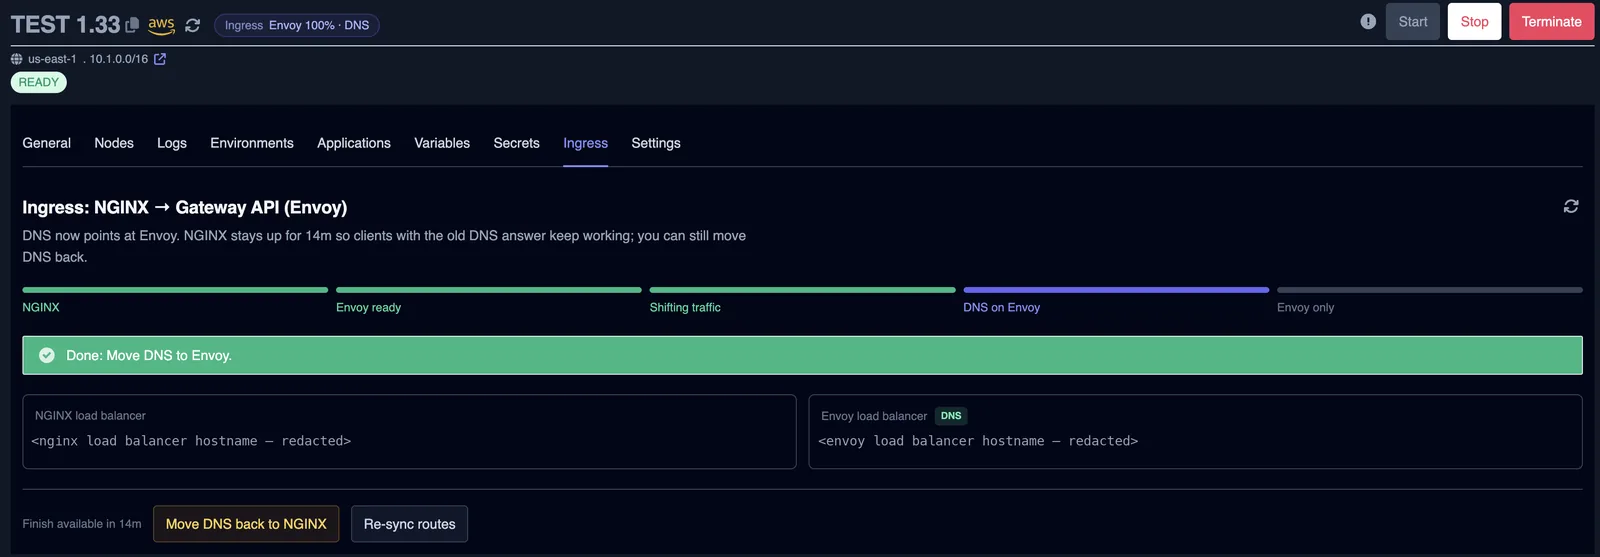
What you will see. The text DNS now points at Envoy. NGINX stays up for … so clients with the old DNS answer keep working; you can still move DNS back. The countdown reaches zero when the soak period is over.
What is happening behind the scenes. Some computers still hold the old DNS answer and keep sending requests to NGINX until their cached answer expires. NGINX stays up so those requests still work.
Can I undo this? Yes. Move DNS back to NGINX is offered until you finish.
Step 5: Finish and remove NGINX
What to click. After the soak period ends, click Finish and remove NGINX, then confirm. This is the last step, and it removes NGINX.
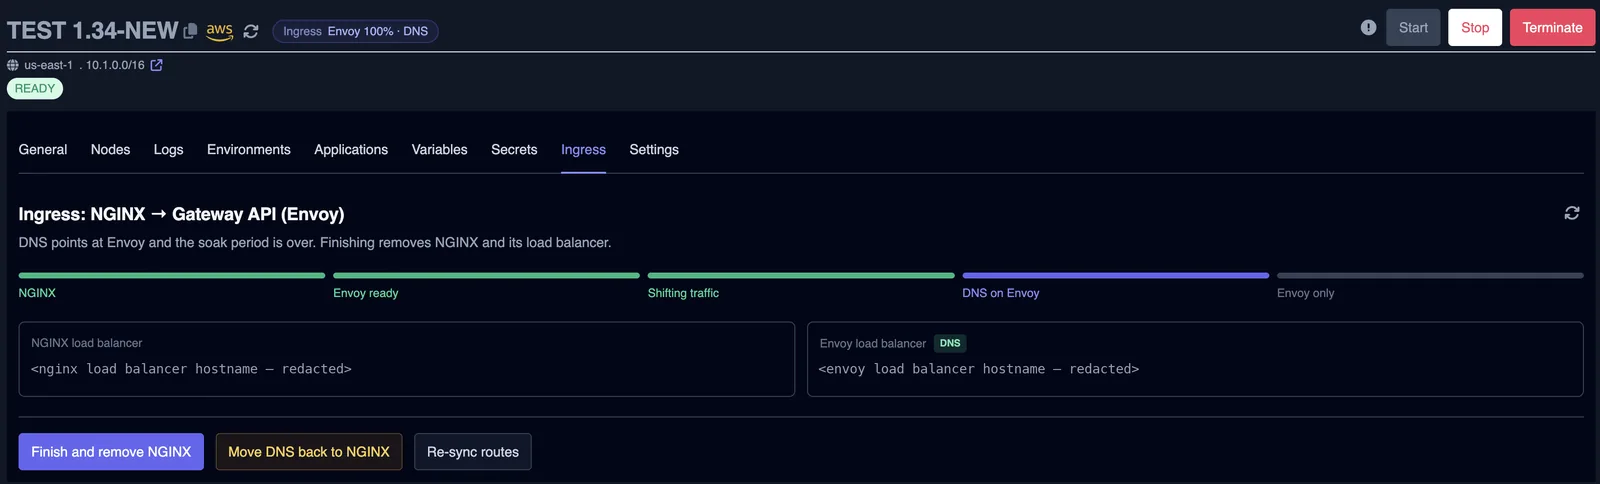
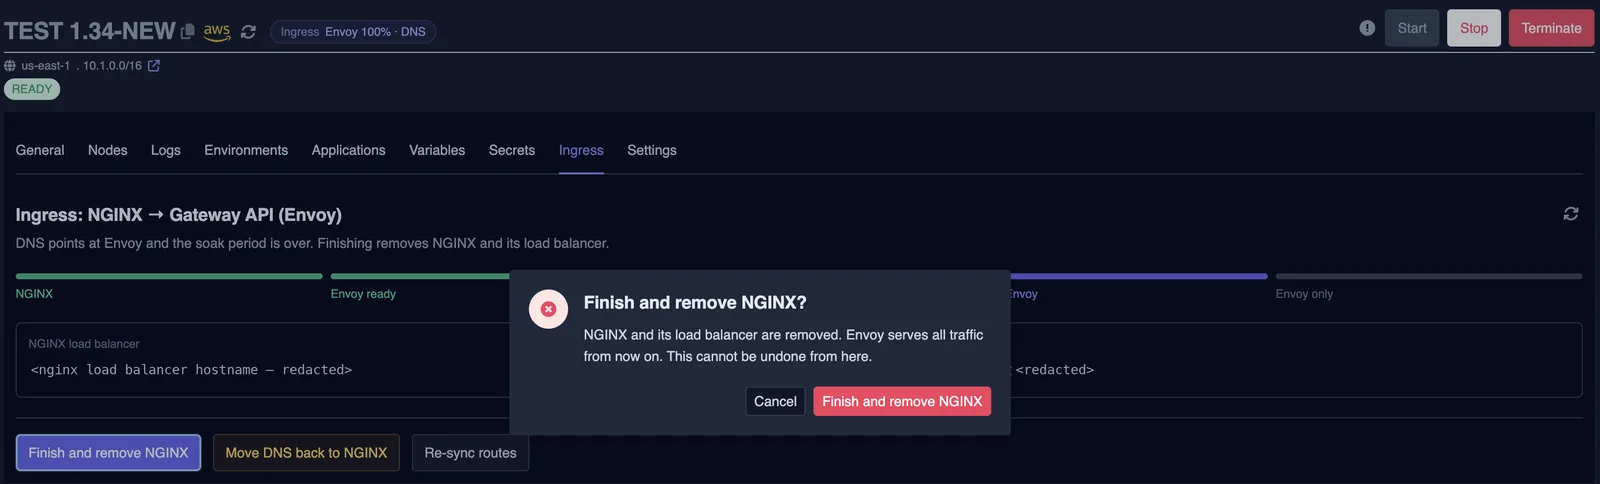
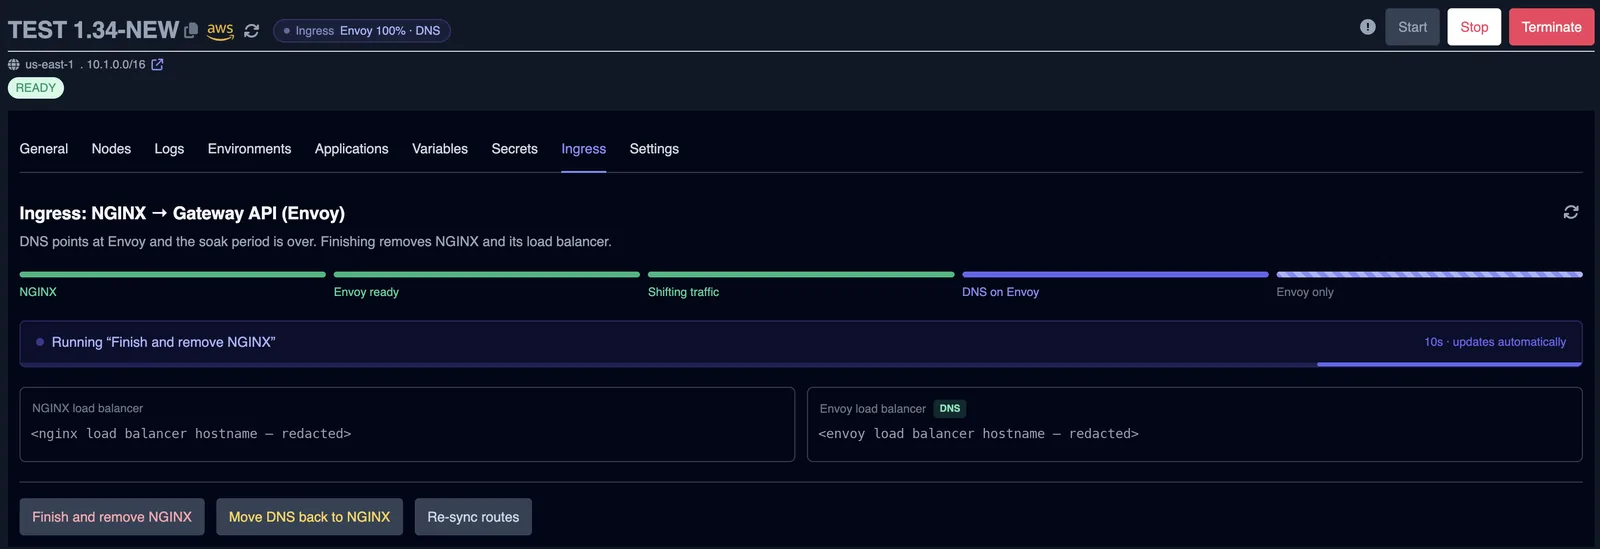
What you will see. The running step, then the stage Envoy only. The panel reads This cluster serves all traffic through Envoy (Gateway API). NGINX has been removed. Some buttons stay on the panel, such as Re-sync routes and Reinstall the gateway.
What is happening behind the scenes. SeaGit removes NGINX and its load balancer. After this, Envoy serves all traffic for the cluster.
Can I undo this? No. After Finish, the panel has no step that brings NGINX back. Do this step only when your apps work on Envoy.
Check that it worked
After the last step, the stage reads Envoy only. Then check the result from the outside, the way a visitor would.
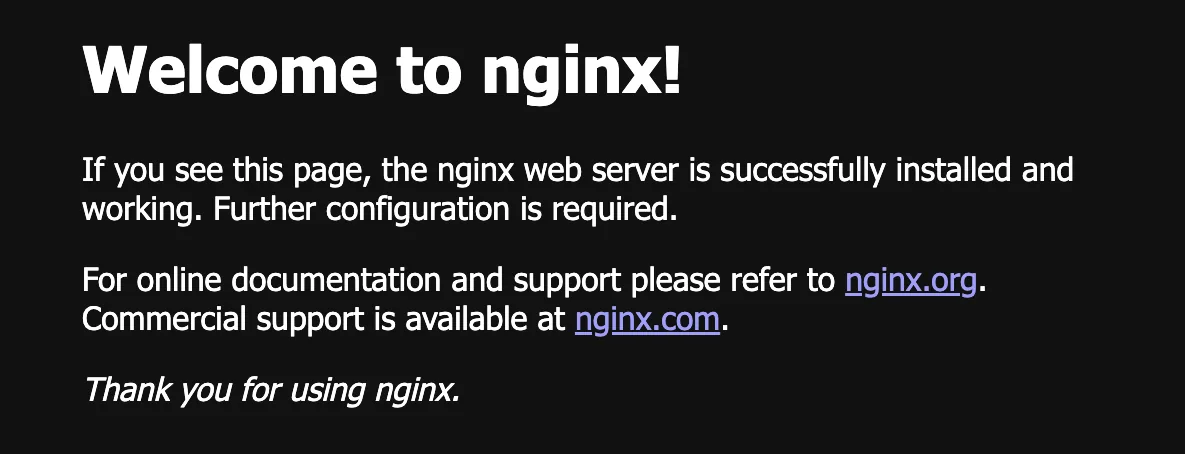
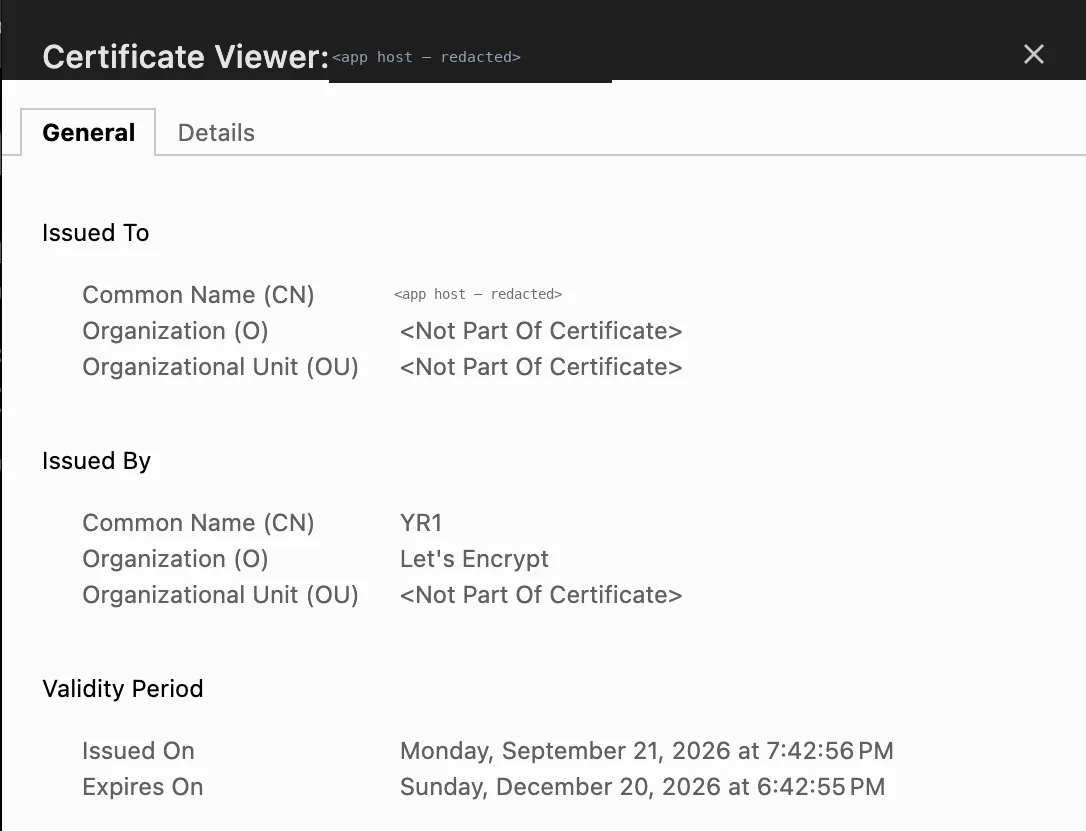
If you have kubectl access to the cluster, three terminal checks help. Replace the example hostname with your own.
kubectl get gateway,httproute -Alists the Gateway and HTTPRoute objects in every namespace. Your app routes should appear.dig +short your-app.example.comprints what DNS returns for the hostname. After DNS moves, the answer should lead to the Envoy load balancer shown in the panel.curl -I https://your-app.example.comprints only the response headers, so you can see that the app answers over HTTPS.
kubectl get gateway,httproute -Adig +short your-app.example.comcurl -I https://your-app.example.comThese commands print only what the cluster returns. Their output depends on your cluster and hostnames, so none is shown here.
If something goes wrong
The panel shows a red banner that starts with Last step … failed, followed by the reason. Read the reason, fix the cause, and then use the same button again. These options cover the rest:
- Stop before DNS moves. Click Abort migration, offered while the stage is Envoy ready or Shifting traffic. Envoy and the copied routes are removed, and NGINX keeps serving. You can also click 0% to send all traffic back to NGINX first.
- Move DNS back. During the soak period, click Move DNS back to NGINX. Envoy keeps running, so you can move DNS to it again later.
- Blockers stay on the list. The DNS step checks again when you click it. Fix the Ingress named in the list, then try again.
- Routes still in step after Finish. The panel shows which Ingress objects the migration still keeps in step. Click Re-sync routes.
- Gateway needs reinstalling. On a finished cluster, Reinstall the gateway re-runs the Gateway install and route checks. It does not bring NGINX back.